Disclosure: This post contains Amazon affiliate links. As an Amazon Associate, we earn from qualifying purchases at no extra cost to you.
Why Vacuum Maintenance Matters
Your vacuum cleaner is one of the hardest-working appliances in your home, yet it is often the most neglected when it comes to maintenance. A well-maintained vacuum not only cleans more effectively but also lasts significantly longer, saving you money on premature replacements. Regular maintenance can extend your vacuum’s lifespan from 3-5 years to 10 years or more.
When vacuums are not properly maintained, they lose suction power, spread dust back into your air through dirty filters, and can overheat due to clogged airflow. This complete maintenance guide covers everything you need to know to keep your vacuum running at peak performance for years to come, regardless of whether you have an upright, canister, stick, or robot vacuum.
Essential Maintenance Schedule
| Task | Frequency | Time Required |
|---|---|---|
| Empty dustbin/bag | When 2/3 full | 1 minute |
| Clean brush roll | Weekly | 5 minutes |
| Check for clogs | Weekly | 5 minutes |
| Wash filters | Monthly | 10 minutes + dry time |
| Inspect belts | Every 3 months | 5 minutes |
| Deep clean | Every 6 months | 30 minutes |
| Replace filters | Every 6-12 months | 2 minutes |
Emptying the Dustbin or Bag
The most basic but crucial maintenance task is emptying your vacuum’s dustbin or replacing the bag before it gets completely full. Most manufacturers recommend emptying when the container is two-thirds full, not waiting until it is completely packed. A full dustbin significantly reduces suction power and puts extra strain on the motor.
For Bagless Vacuums
Empty your bagless dustbin over a trash can outside or in the garage if possible to avoid releasing dust back into your home. Many modern vacuums feature hygienic emptying systems that seal the dustbin during emptying. If you have allergies, consider wearing a dust mask during this process.
Once a month, wash the dustbin with warm soapy water and allow it to dry completely (at least 24 hours) before reinstalling. This prevents odor buildup and removes fine dust particles that cling to the interior walls.
For Bagged Vacuums
Replace bags when they reach the fill line or when you notice reduced suction. Using bags past their capacity can cause them to burst or allow dust to bypass directly into the motor. Always use manufacturer-recommended bags, as off-brand bags may not seal properly and can damage your vacuum.
When changing bags, check the bag compartment for any escaped debris and wipe it clean before installing a new bag. This ensures a proper seal and prevents dust from contaminating the motor area.
Cleaning and Maintaining Filters
Filters are the lungs of your vacuum, capturing dust and allergens while allowing air to flow through. Dirty filters are the number one cause of reduced vacuum performance and can also damage your motor over time. Most vacuums have multiple filters that require different maintenance approaches. For allergy-focused options, see our HEPA vacuum guide.
Pre-Motor Filters
These foam or felt filters protect the motor from debris. Most are washable and should be rinsed monthly under cool water until the water runs clear. Squeeze out excess water (never wring) and allow to air dry completely for at least 24 hours. Never put a damp filter back in your vacuum as this can damage the motor and promote mold growth.
HEPA Filters
HEPA filters capture 99.97 percent of particles as small as 0.3 microns. Some HEPA filters are washable while others must be replaced. Check your user manual for specific instructions. Washable HEPA filters should be rinsed monthly and replaced every 12-18 months. Non-washable HEPA filters typically need replacement every 6-12 months.
Never vacuum or brush a HEPA filter as this damages the delicate filter media. If your HEPA filter is washable, use only cool water and never use soap or cleaning solutions.
Post-Motor Filters
Located after the motor, these filters capture any particles that escape the primary filtration. Follow manufacturer instructions for cleaning or replacement. These filters are often forgotten but play a crucial role in air quality.
Brush Roll Maintenance
The brush roll (also called beater bar or agitator) is the spinning brush that agitates carpet fibers to release embedded dirt. Over time, hair, string, and fibers wrap around the brush roll, reducing its effectiveness and potentially damaging the motor or belt.
Weekly Brush Roll Cleaning
Turn off and unplug your vacuum. Most brush rolls can be removed by releasing clips or unscrewing end caps. Use scissors or a seam ripper to cut away tangled hair and fibers. Be careful not to cut the bristles themselves. A good tip is to slide the scissors along the length of the brush roll from end to end, slicing through tangles.
Once cleared of tangles, check bristles for wear. If bristles are flattened, bent, or missing in sections, it is time for a replacement brush roll. Worn bristles significantly reduce carpet cleaning performance.
Self-Cleaning Brush Rolls
Many modern vacuums, particularly Shark models, feature self-cleaning or no-tangle brush rolls. While these require less maintenance, they should still be inspected monthly and cleaned if any debris has accumulated.
Checking for and Clearing Clogs
Clogs are a common cause of sudden suction loss. They most often occur in the hose, wand, or where the floor head connects. Regular inspection prevents buildup that becomes a complete blockage.
How to Check for Clogs
Disconnect the hose and look through it toward a light source. You should see light clearly through the entire length. Drop a coin through the hose; it should fall freely with no obstruction. Do the same for the wand and any other detachable sections.
Clearing Clogs
For soft clogs, gently push a broomstick or long dowel through the hose to dislodge debris. Never use excessive force as this can puncture the hose. For stubborn clogs, soak the hose in warm water to soften the blockage, then push through with gentle pressure.
Check the area where the hose connects to the vacuum body, as debris often accumulates at connection points. Clear any buildup with a dry cloth or compressed air.
Belt Inspection and Replacement
The belt connects the motor to the brush roll, spinning it during operation. Belts stretch over time and eventually break completely. A stretched belt reduces brush roll speed, decreasing carpet cleaning effectiveness even though the brush appears to be spinning.
When to Replace the Belt
Replace your vacuum belt every 6-12 months depending on use, or immediately if you notice:
- Burning rubber smell during operation
- Brush roll spinning slower than normal
- High-pitched squealing sound
- Brush roll not spinning at all
- Visible cracks, fraying, or stretching on the belt
How to Replace a Belt
Consult your user manual for specific instructions, but the general process involves:
- Unplug the vacuum and remove the brush roll cover plate
- Remove the old belt from the brush roll and motor shaft
- Slide the new belt over the brush roll, then stretch it onto the motor shaft
- Replace the brush roll and cover plate
- Spin the brush roll by hand to ensure proper belt tension
Shop Vacuum Replacement Belts on Amazon
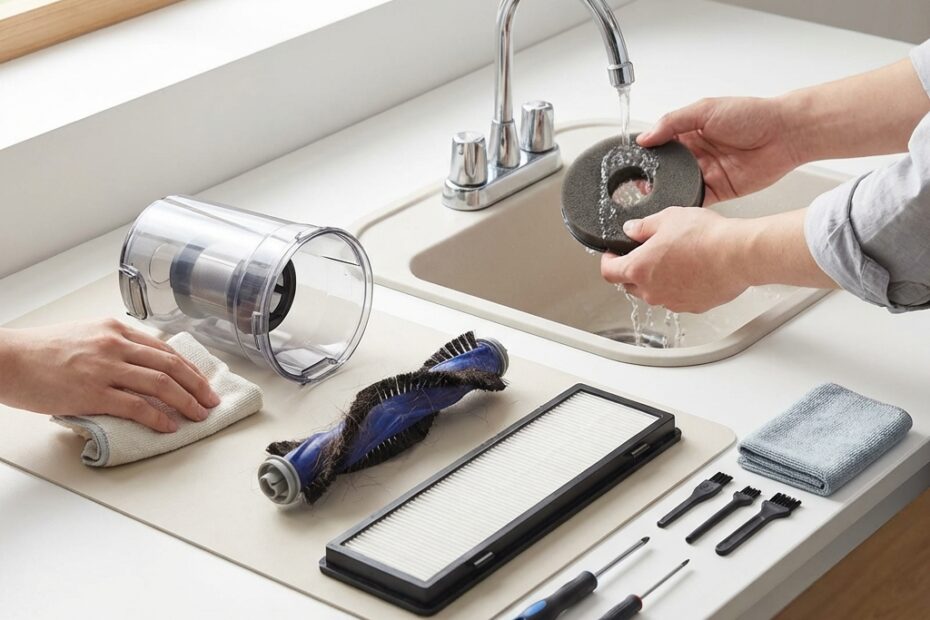
Deep Cleaning Your Vacuum
Every six months, give your vacuum a thorough deep cleaning:
- Disassemble all removable parts including hose, wand, floor heads, filters, dustbin, and brush roll
- Wash all washable components with warm soapy water
- Wipe down the vacuum body with a damp cloth, avoiding electrical components
- Clear any debris from connection ports and the brush roll chamber
- Check cords for damage, fraying, or exposed wires
- Inspect all seals and gaskets for wear
- Allow all washed components to dry completely (24-48 hours)
- Reassemble and test operation
Maintenance by Vacuum Type
Upright Vacuums
Uprights require regular belt checks, brush roll cleaning, and attention to the connection between the handle and base which can loosen over time. The height adjustment mechanism should be checked periodically to ensure it is changing properly for different floor types.
Canister Vacuums
The flexible hose on canisters is prone to cracks and punctures. Inspect regularly and replace if damaged. The retractable cord mechanism can become clogged with dust, causing rewind issues. Occasionally pull the cord to full extension and wipe it with a damp cloth.
Cordless Stick Vacuums
Battery care is crucial for cordless vacuums. Avoid storing with a fully depleted battery, and do not leave on the charger indefinitely after reaching full charge (unless the manufacturer specifies otherwise). The handheld vacuum conversion on many stick vacuums requires regular filter cleaning due to the smaller dustbin.
Robot Vacuums
Robot vacuums require regular sensor cleaning to maintain navigation accuracy. Wipe cliff sensors, camera lenses, and LiDAR sensors weekly with a soft dry cloth. Side brushes on robot vacuums wear quickly and should be replaced every 3-6 months. The main brush roll should be cleaned weekly and checked for damage.
When to Replace Your Vacuum
Even with perfect maintenance, vacuums eventually wear out. Consider replacement when:
- Suction remains weak after thorough maintenance and filter replacement
- Motor makes unusual sounds like grinding or high-pitched whining
- Burning smell persists even with new belt and cleared clogs
- Electrical issues develop such as cord damage or intermittent operation
- Replacement parts are no longer available
- Repair costs exceed 50 percent of a new comparable vacuum’s price
Ready for an upgrade? Explore our guides to the best cordless vacuums under 300 dollars or budget vs premium vacuum comparison.
Frequently Asked Questions
How often should I vacuum?
For most homes, vacuuming high-traffic areas 2-3 times per week and the entire home weekly is sufficient. Homes with pets, allergies, or young children may benefit from daily vacuuming in key areas. Robot vacuums can handle daily maintenance while you deep clean weekly with a more powerful manual vacuum.
Why does my vacuum smell bad?
Bad vacuum smells typically come from dirty filters, a full dustbin, or debris trapped in the brush roll. Wash all filters, empty and clean the dustbin, and clean the brush roll thoroughly. If the smell persists, check for trapped pet hair or debris in the hose. For persistent odors, place a dryer sheet in the dustbin compartment.
Can I wash my vacuum’s HEPA filter?
Only if the manufacturer specifically states it is washable. Never wash a filter that is not designed to be washed, as this destroys the filter media. Washable HEPA filters should be rinsed with cool water only, no soap, and dried completely for 24-48 hours before reinstalling.
Why is my vacuum losing suction?
The most common causes are a full dustbin or bag, dirty filters, clogged hose or wand, incorrect height adjustment for your floor type, or a stretched or broken belt. Work through each possibility systematically starting with the easiest fixes.
Conclusion
Regular vacuum maintenance is a small investment of time that pays significant dividends in cleaning performance and appliance longevity. By following this maintenance schedule, you can keep your vacuum running at peak performance for many years while maintaining healthy indoor air quality for your family.
Remember the key maintenance tasks: empty the dustbin regularly, clean filters monthly, clear tangles from the brush roll weekly, check for clogs when suction drops, and perform a deep clean every six months. Your vacuum works hard for you; taking care of it ensures it can continue doing its job effectively.